How Do You Use a Camping Coffee Percolator?
Waking Up to the Crackle of a Campfire
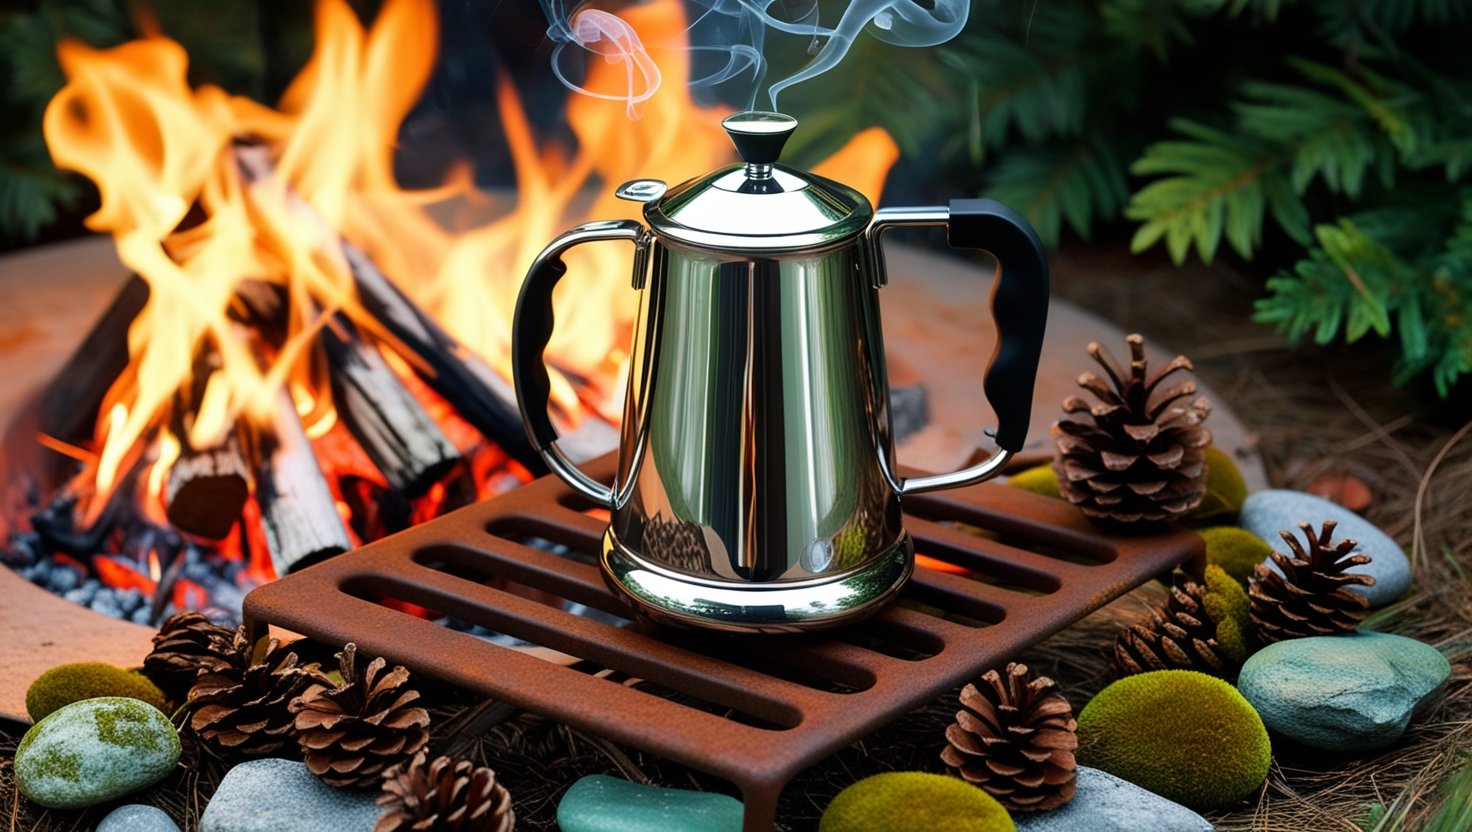
The morning mist curled over the pine trees as the first golden light spilled into the forest clearing. There, on a cast-iron grate above glowing embers, sat a shiny metal coffee percolator gently bubbling away. No alarms. No espresso machines. Just the hiss of flame and the comforting sound of coffee brewing in the wild.
If you’ve ever camped out under the stars, you know that morning coffee hits different. Stronger. Earthier. More essential. But for many first-timers, using a camping coffee percolator can seem like a mystery. No buttons, no screens—just heat, water, grounds, and time.
Let’s break down the magic of percolated coffee and how you can master it, even miles from the nearest café.
What Is a Camping Coffee Percolator?
A camping coffee percolator is a classic coffee brewing device designed for rugged use over an open flame, camp stove, or grill. Typically made from stainless steel or enamel-coated metal, it’s made to withstand high heat and outdoor conditions.
The percolator works by cycling hot water through ground coffee multiple times using a vertical tube system. As the water heats, it rises through the tube, spills over the coffee grounds in a basket, and filters back down into the pot—repeating until the desired strength is reached.
Simple. Durable. Timeless.
Why Use a Percolator While Camping?
Before we get into the “how,” it’s worth asking why so many outdoor lovers still use percolators when there are other options like French presses, pour-overs, or instant coffee.
Benefits of a Percolator:
✅ No electricity required
✅ Brews multiple cups at once (ideal for groups)
✅ Durable and built for rugged use
✅ Bold, robust flavor
✅ Reusable—no paper filters needed
There’s a nostalgic, cowboy-coffee charm to percolator brewing that connects you to the rituals of the past—just you, your fire, and a perfect cup.
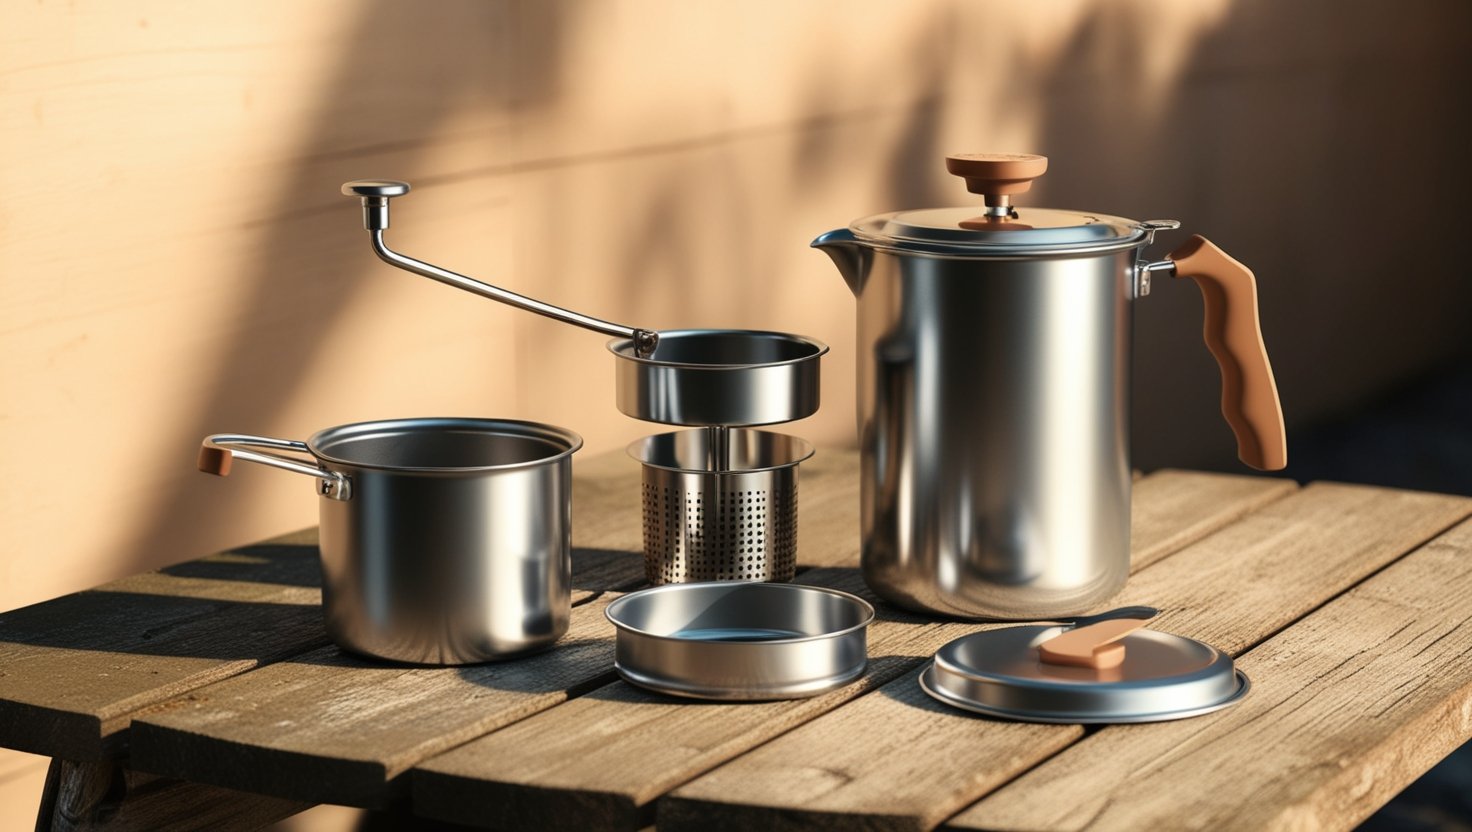
Anatomy of a Camping Percolator
To understand how to use one, let’s break it down:
Pot Body – Holds water and brewed coffee.
Percolator Tube – Vertical tube inside the pot, channels heated water upward.
Coffee Basket – Sits near the top, holds coffee grounds.
Basket Lid – Covers grounds to prevent spillage.
Glass or Plastic Knob – Lets you see the coffee “perk.”
Once you understand the parts, using a camping coffee percolator becomes second nature.
Step-by-Step: How to Use a Camping Coffee Percolator
Whether you’re brewing on a campfire, propane stove, or hot coals, follow these steps:
🔹 1. Measure Your Water
Open the pot and pour cold water into the body—generally 1 cup of water per serving. Most camping percolators range from 6 to 12 cups.
💡 Tip: Use filtered or bottled water if the local water has a strong mineral taste.
🔹 2. Add Coffee Grounds
Place the percolator tube and basket inside the pot.
Measure out 1 tablespoon of medium-coarse ground coffee per cup.
Avoid super-fine grounds—they’ll clog the basket and leave sediment.
Optional: Use a metal or mesh filter inside the basket to reduce grit.
🔹 3. Assemble and Secure
Attach the basket lid, place the pot lid securely, and make sure the percolator knob is visible. Double-check everything is seated properly to avoid leaks or tipping.
🔹 4. Heat It Up
Place the percolator on your:
Campfire grate
Propane camp stove
Grill over hot coals
Keep the heat medium to low. Rushing it can result in bitter coffee.
🔹 5. Watch for the Perk
Once water heats, you’ll see it bubble up through the percolator knob—this is called “perking.”
Let it perk for 7–10 minutes depending on strength.
Watch for the color of the bubbling liquid to darken.
The longer it perks, the stronger the brew.
🔹 6. Remove from Heat and Let Settle
Once desired strength is reached:
Remove the percolator from heat using a towel or gloves.
Let sit for 1–2 minutes to settle the grounds.
Carefully remove the lid and take out the basket and tube.
You’re now ready to pour and enjoy.
Tips for Great Camp Coffee Every Time
Use medium-coarse grind to avoid over-extraction.
Start with cold water for even heating.
Keep heat moderate—not boiling hard.
Clean all parts after every use to prevent bitter buildup.
Experiment with brew times to dial in your taste.
Troubleshooting: Common Percolator Problems
| Problem | Likely Cause | Solution |
|---|---|---|
| Weak coffee | Too short brew time or not enough grounds | Brew longer or add more grounds |
| Bitter taste | Over-brewing or too fine a grind | Reduce brew time or use coarser grind |
| Grounds in coffee | No filter or loose lid | Use a mesh filter or secure basket lid |
| No perking | Too low heat or clogged tube | Increase heat or clean tube |
Percolators reward patience and attention. Once you get your rhythm, they’re incredibly consistent.
Cleaning Your Percolator After Use
Always clean your percolator after every use, even while camping:
Dump grounds into a compost bag or trash.
Rinse basket, tube, and pot with warm water.
Use mild soap if available—but rinse thoroughly.
Dry parts completely to prevent rust.
Never let coffee sit in the pot for hours—it can cause metallic flavors to develop.
A Nostalgic Ritual Worth Keeping
In a world of pods and presses, the percolator brings us back to a simpler time—when making coffee was a ritual, not just a routine.
There’s something special about standing in the early morning chill, watching steam curl from your pot, and hearing that rhythmic “perk-perk” sound. It’s coffee not just as a drink, but as an experience.
That’s the heart of percolator brewing. And it’s why so many campers still swear by it.
How Coffea Alchemy Honors Old-School Brewing
At Coffea Alchemy, we believe in celebrating every coffee ritual—from high-tech extractions to campfire brews. Percolator coffee might not be the trendiest method, but it’s one of the most honest. It teaches patience. It rewards care. And it never forgets the joy of simplicity.
Whether you’re sipping under starlight or watching sunrise with a warm tin cup in hand, we support the brews that make memories.
Final Thoughts
Using a camping coffee percolator isn’t just about making caffeine. It’s about slowing down, learning your tools, and connecting with nature through ritual. Once you’ve tasted a well-brewed percolator coffee over a campfire, it’s hard to go back.
So pack your percolator, gather your grounds, and let the wilderness be your café.
Are you ready to turn your next camping morning into a moment worth brewing for?
Related Post
Our newsletter
Subscribe to our weekly newsletter & keep up with our latest recipes and organized workshops. You can unsubscribe at any time.